Interface
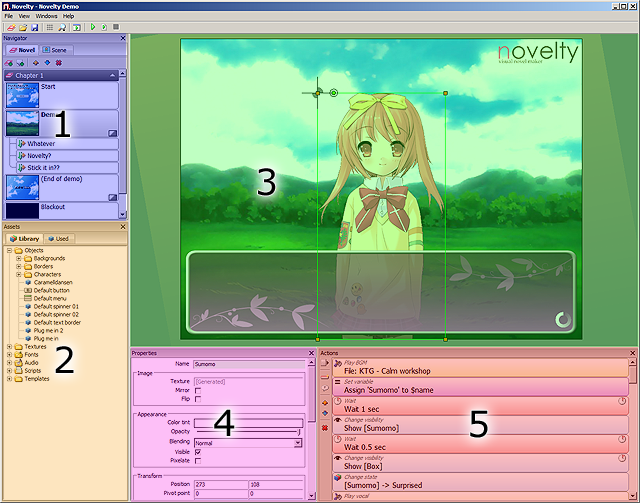
Fig 1: Novelty workspace
- Navigator (Novel & Scene)
- Asset library
- Scene view
- Properties window
- Action window (Story and events)
Note: The screenshot above is only one example of how the workspace could look. The workspace is very flexible. All of the individual windows can be dragged around, resized and docked to suit your needs. The workspace is saved between sessions.
Keyboard shortcuts:- Alt + N - Toggle Navigator window.
- Alt + A - Toggle Assets window.
- Alt + E - Toggle Actions window.
- Alt + P - Toggle Properties window.
- Alt + S - Toggle Script editor.
- Ctrl + Tab - Toggle all windows.
Navigator
The navigator has two tabs, Novel and Scene.
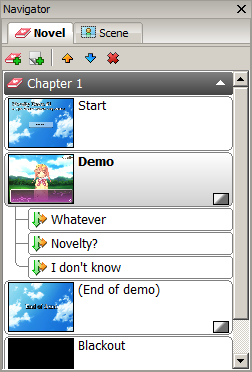
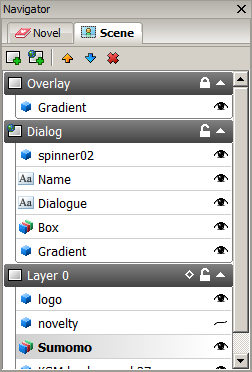
Fig 2: The Novel and Scene tabs
Novel
Here you manage the chapters and pages of your story. You can easily add, remove or change the order of individual pages.
Scene
Lists the layers and objects of the current scene.
Note: You can separate the tabs by clicking and dragging to one of the sides of the panel.
Asset library
The Asset library lists all of your currently available assets. To place an object in the scene, simply double-click the asset. Some assets can only be added to the project as a resource. To do this you right-click the asset and select Add to project.
See also: The Asset library
Scene view
This is the main editor window that displays the current scene.
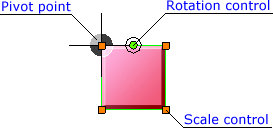 Fig 1: Default object controls |
 Fig 2: Hold Ctrl to resize |
 Fig 3: Moving pivot (Ctrl+Alt+Shift) |
- Left mouse button - Selection.
- Right mouse button - Context menu.
- Shift + Left mouse button - Add to selection.
- Ctrl + Left mouse button - Remove from selection.
- Click and drag - Multiple selection.
- Click and drag [object] - Move object(s).
- Middle mouse button - Pan scene.
- Ctrl + mouse wheel - Zoom in/out.
- Hold Shift [object] - Snap to grid.
- Hold Ctrl [object] - Resize mode.
- Hold Ctrl+Shift+Alt [object] - Pivot mode.
- Ctrl + C - Copy selection.
- Ctrl + X - Cut selection.
- Ctrl + V - Paste objects.
Properties
This window lets you manipulate the properties of the currently selected object, action or page.
Actions
View and edit the current page's action list.
- Toggle quicklist - Show/Hide the action quicklist.
- Add action - Add a new action after the current one or at the end of the list.
- Move up - Move up the current action(s).
- Move down - Move down the current action(s).
- Remove - Remove the current action(s).
When an action is selected, a preview of the scene up to that point will be displayed in the scene view. Selecting multiple actions disables the preview.
Script editor
Create and edit scripts
- Add script - Add an empty script file.
- Save scripts - Save all changes to scripts.
- Compile scripts - Compile the scripts and report any syntax errors.