Using NoveltyML Designer
NoveltyML Designer is a tool for creating new assets for Novelty. As the name suggests it is a tool aimed at NoveltyML, the Novelty markup language. At essentially a text-editing tool, but with some added features, such as syntax highlighting, autocompletion and live preview.
Designer also has a code-less design mode that enables you to make objects without having to fully understand the language.
Related articles:
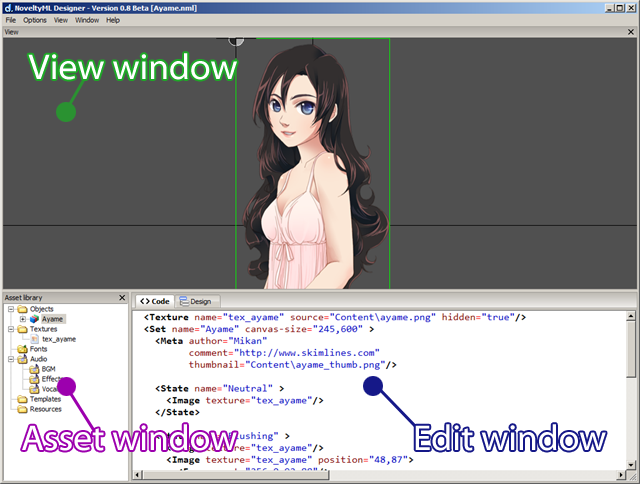
Fig 1: NoveltyML Designer interface
View window
This window lets you view the currently selected asset, if any. It updates automatically to reflect any changes that you make in the code. You can use the mouse wheel to zoom in and out or hold the middle mouse button to pan.
Assets window
This window behaves similarly to the Asset library in the Novelty. It lists all of the assets that you've created or are using in your code. Assets are arranged the same folder structure as in Novelty.
Edit window
The edit window has two tabs. The first one is a text editor for typing NoveltyML. The other is an alternative interface for doing the same thing without the hazzle of code. You can freely switch between these two tabs as a change in one will be reflected in the other.
Using the code-less design mode
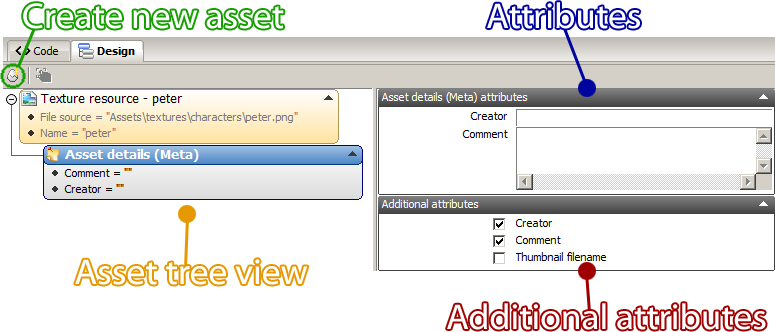
Fig 2: Design mode
By clicking the Design tab you switch to an alternative mode that lets you create assets without typing code. This section will explain how it works.
Create new asset
Click this button to create a new asset. Pick any of the available asset types from the drop-down menu.
Asset tree view
This is a tree view that displays a visual representation of your current asset structure. Each box represents a NoveltyML tag and lists its attributes. To manipulate a tag, right-click on one to bring up its context menu.
To add a child to a tag, right-click on it and select Add child followed by the tag you wish to add. Not all tags have children.
Attributes
This window shows the attributes defined on the currently selected tag. Edit the value for each attribute in their respective text boxes and controls.
Additional attributes
This shows all of the available attributes of the tag, including the ones you haven't defined. Check or uncheck a box to define or undefine that attribute. When an attribute is undefined, a default value will be used instead.
For instance, if you leave the size-attribute undefined on an Image, then the size of its texture will be used.
Note: By default the additional attributes box is closed. Click the down-arrow on the header to expand it.
Manipulate
When creating an object asset, you can click the manipluate button (![]() ) to enable the same object controls that you have in the Novelty editor. This is a much more natural way to edit an object's transform attributes (position, size, scale, rotation) compared to manually typing them in.
) to enable the same object controls that you have in the Novelty editor. This is a much more natural way to edit an object's transform attributes (position, size, scale, rotation) compared to manually typing them in.
Exclusively to the NoveltyML Designer, you also have the ability to crop Images. To enable cropping, press and hold the Ctrl + Alt keys.
Writing NoveltyML
If you have experience with other popular markup languages like HTML or XML or are adventurous in general, you may choose to create your assets manually using NoveltyML. It's a flexible and powerful design language that holds no limits on your creativity. The word "manually" is slightly misleading because NoveltyML Designer is literally packed with features that makes your coding a smooth and easy experience.
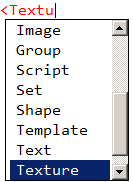
For instance, when you begin to type a new tag, you will get a suggestion popup. It displays a list of suggestions and you can complete a word by pressing Enter.
You can always bring up the suggestion list by pressing Ctrl + Space.
You can access the suggestion list from any point in your code, such as when entering a filename...
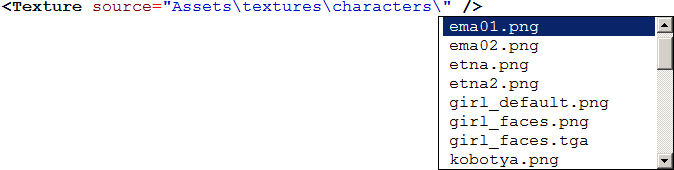
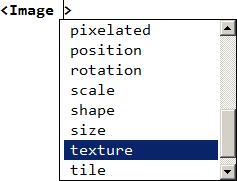
... or when exploring a tag's attributes.
Typing assistant
To help you type NoveltyML faster you can use the typing assistant (enabled by default). The assistant will automatically fill in the boiler plate code to save you time.
For example, if you enter the following code on a new line:
<Texture
the typing assistance will automaticall append the following:
<Texture source="" name="" />
If you don't like this kind of intrusive editing, you can turn off the assistant in the Options menu.