Importing an image file
The quickest way to get your image into Novelty is to right-click in the scene view to bring up the context menu and select Create -> Image from file...
This will bring up a file dialog that lets you select the file to import. Once imported it shows up in the Asset library in the Textures\Imported folder.
Importing assets (with wizards)
The easiest way to import textures and sound is by using the import wizards. They will copy the asset files to the correct folders and produce the necessary NoveltyML for you. They are found in the File menu under Import wizards.
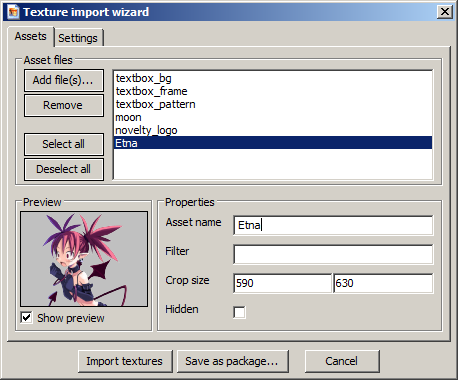
You can load more than one file at once. Just add them by clicking the Add files button.
Once you've added your files you can configure how they should be imported. You can rename them and set a filter (folder in asset library).
When you're configured everything to your liking, you can either import the assets to an XML file (Import assets) or save them as a content package. A content package is a single file and thus very easy to distribute.
Note: BMP files are automatically converted to a more diskspace efficient format.
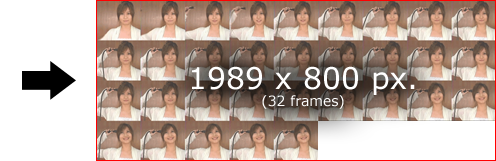
Converting GIF animations
Animated GIF-files are not natively supported by Novelty and will be automatically converted to a format that Novelty can use. It will produce a single (hidden) texture and an animation resource and then use them together in an Image object (which appears in the Asset library).
An important thing to note here is that the resulting texture can potentially become very large. Both in dimensions and file size. The maximum recommended texture size is 2048x2048. This is something you will have to take note of when importing GIF animations and other images.