Introduction
Consider the following scenario: You have two characters and you want to write a conversation between them.
To do this in the most straight way would mean you'd have to...
- Place the characters in the scene (often in multiple pages)
- Hide them
- Make them enter the scene with an action or script
- Display dialogue
- Write dialogue
- Change the character's facial expressions between paragraphs with actions
- Etcetera...
Creating an actor
There are two ways to create an actor. The first is to simply pick an existing actor from the asset library:
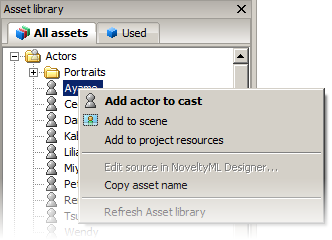
Fig 1: Picking an actor from the Asset library
Otherwise, place your character (or any Image or Set) in the scene, right click on it and select Create new actor.
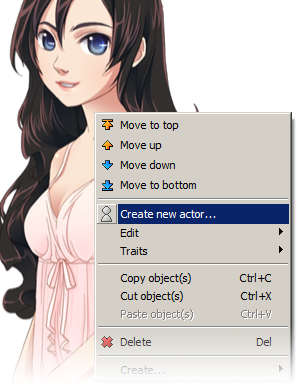
Fig 2: Creating an actor from the scene
Regardless of how you create your actor you will be prompted to enter a name, text color and/or gender. (Setting the gender doesn't serve any purpose yet but may do so in the future).
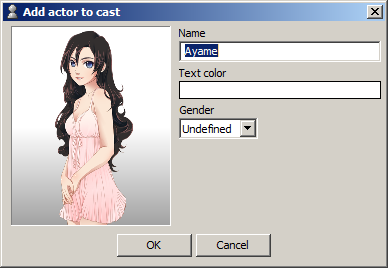
Fig 3: Entering the actor's details
Click OK to finish. Once you've registered the actor you can delete the original object from the scene, if any. You won't need it any more.
Note: You can always review and edit your actors in the Cast manager (Alt+M). From there you can also create 'Empty actors', i.e. actors that aren't associated with any scene object.
Using actors
Once an actor has been registered you can bring it out at any point of your story, in any page.
Just use the Enter actor action. It gives you several options in how the character should appear:
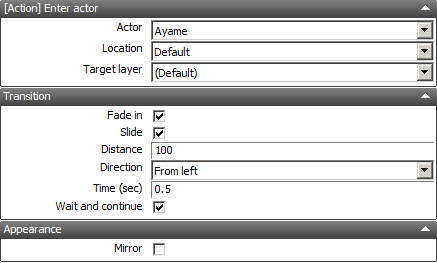
Fig 4: Properties of an Enter actor action
When an actor has been entered into the scene, it acts just like any other object and can thus be modified further with other actions. Additionally, Dialogue actions will recognize actors by name and present additional options to make it easier for you to do common tasks.
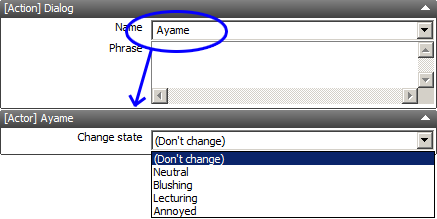
Fig 5: A Dialogue actions showing additional options